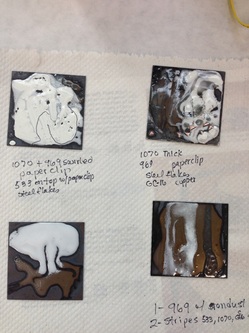
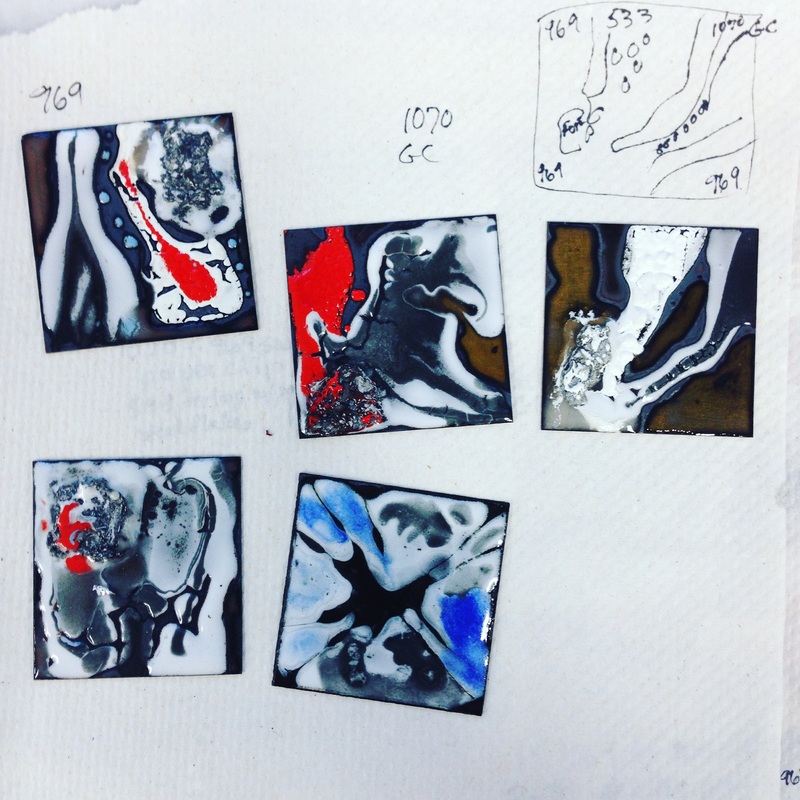
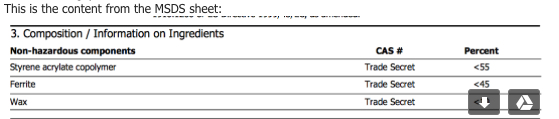
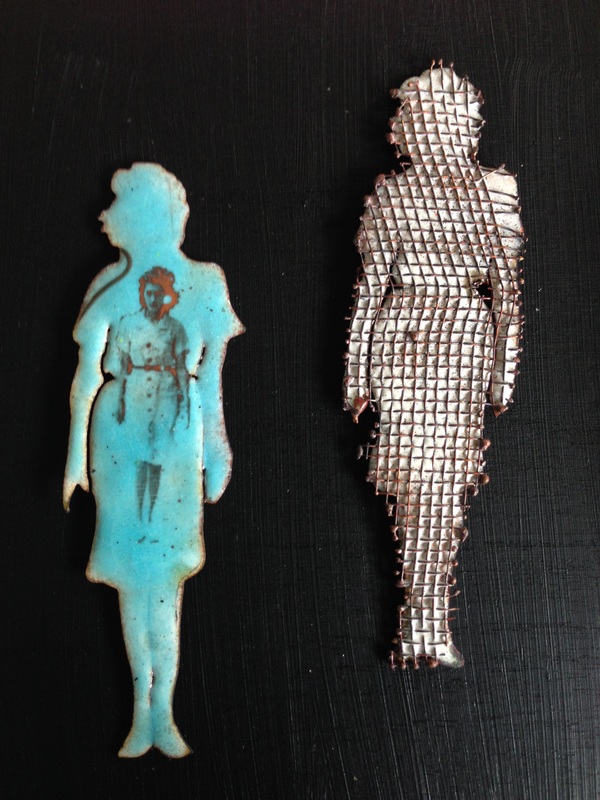
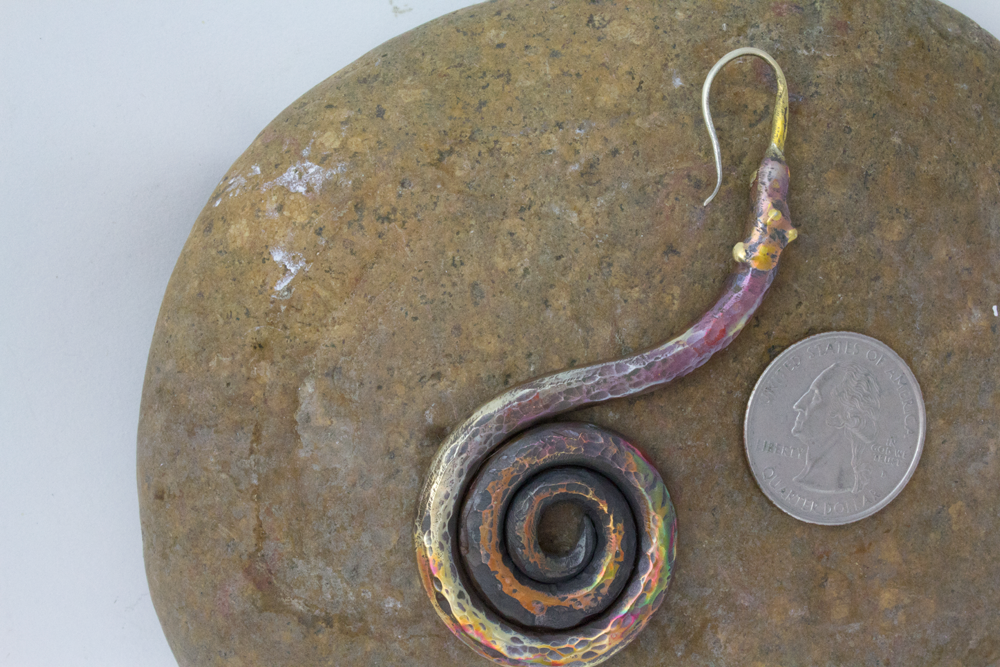
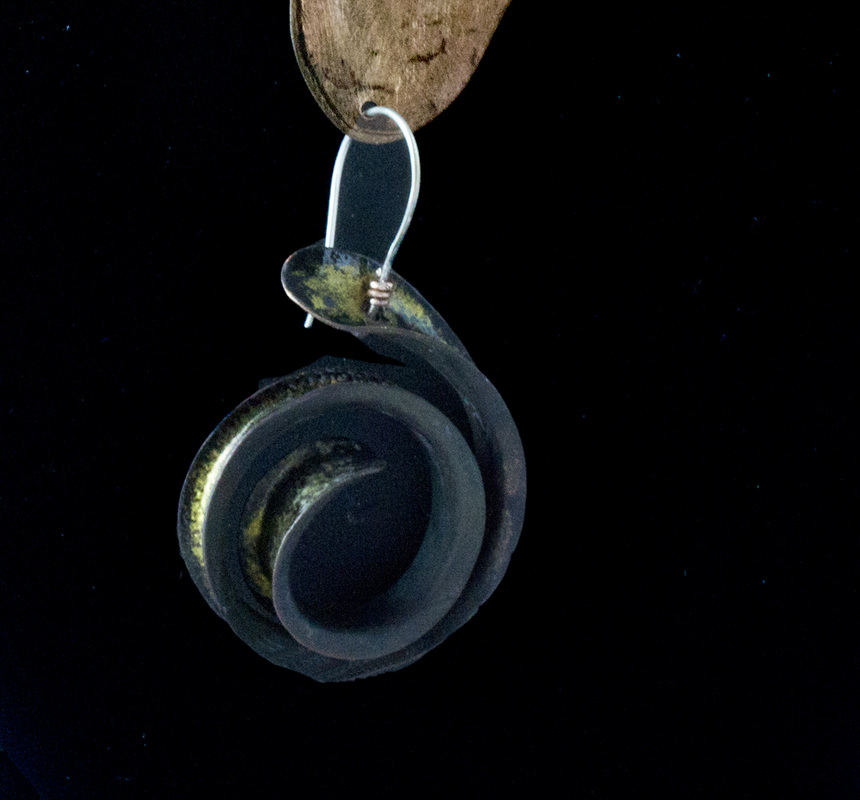
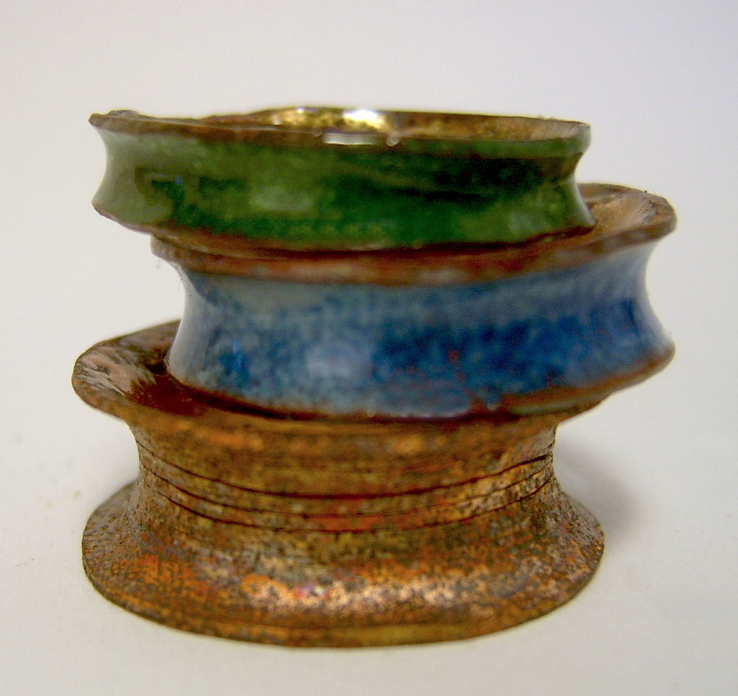
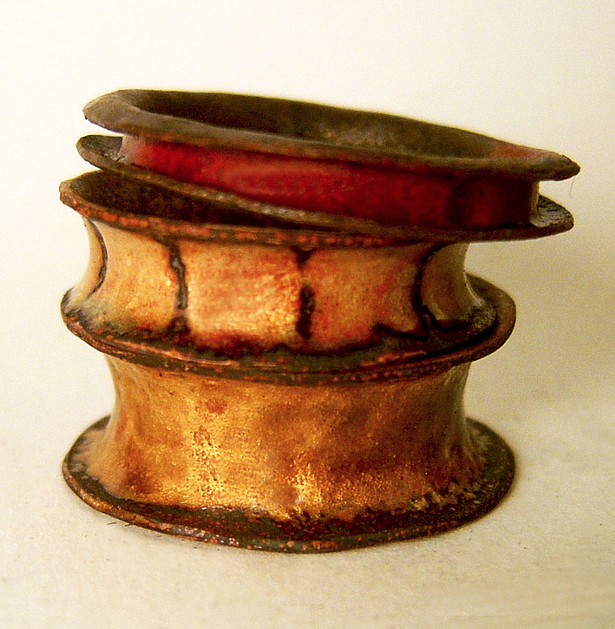
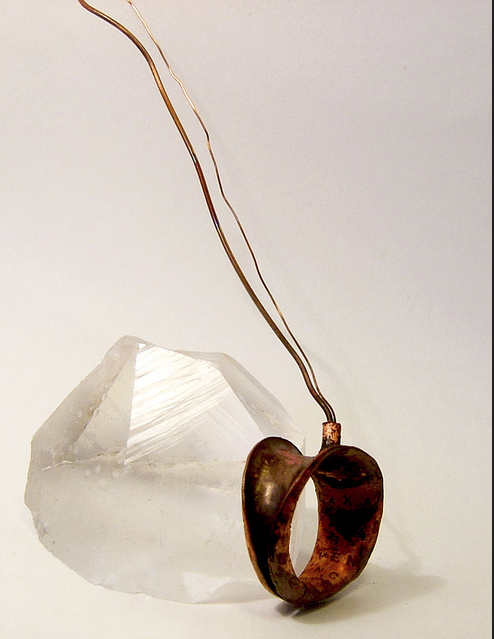
Markasky
  • Home
  • Surviving 2020
  • obsession
    • Private Icons >
      • Jewelry/Accessories
      • Panels
    • Tarot
    • Metal Fabric/Clothing >
      • Process Gallery 1
      • Process Gallery 2
    • Natural >
      • Elegant & Organic
    • unnatural >
      • Photobooth
      • Photobooth Digital 1
      • Photobooth Digital 2
      • Photobooth Digital 3
      • Photobooth Digital 4
      • Photobooth Digital 5
      • Fine Art America
  • Danger
    • Bad Ass
    • The Dangerous Vagina
  • News
    • What's Old
  • Contact
    • Links of Interest
  • About
    • BIO
    • Statement
    • Resume
    • Press
    • Studio/Tools
    • Dictionary
  • Videos
  • Blog
  Markasky

Enamels and Decals

8/15/2015

5 Comments

 
The main ingredients:
The proper printer and the proper decals.
I use an HP LaserJetP1102w. The toner cartridge is 85A. Pretty much any printer that uses an 85A cartridge should work for the decals. If you look at the MSDS sheet of a particular type of toner you can find out the percentage of iron ferrite in it. Below is what you are looking for. Ferrite is an ingredient of toner, powdered iron, at high temperatures in the presence of air, it will become iron oxide. For example, the Lexmark 260 MSDS listed the percentage of ferrite in the toner as 7-13%, where the HP is 45%, giving it more durability. I have only used the 45% one. (Thanks to Ed Lay for that info!)
Picture
I get my decals from DecalPaper.com. Below is the code and description of what I get. I prefer the clear decal paper over the white. They seem to come out clearer.
http://www.decalpaper.com/
Picture
For this sample I used Thompson's 1020 unleaded titanium white. (Counter enamel just like you would do for anything else you enamel. I don't always counter enamel) The decals show up better on a lighter enamel, but of course it depends on what you want and I always feel it's a good thing to experiment. Opaques and transparents will both work, it will just be a different look. You can also enamel on top of the decal, but too many firings will eventually burn out the decal, at least it will with the torch, not sure about kiln-firing.
Picture
Picture
After printing your sheet of decals, cut out the one that will fit on your metal, and drop it into some water. I did use a decal with white backing instead of clear, only because I just wanted to get something quick so I could take some pictures... after all it is Friday night and I said I would do this at the end of the week... some people consider Sunday the end of the week... It doesn't really matter how long you leave it in the water, but you want it in there long enough to get the decal to slide off of the backing paper, maybe a minute. It won't hurt it to be in there longer. Put the decal ink-side down on the metal (the backing paper will be on top) and slide the backing off of the decal. If you ever made models as a kid or with your kids and put the decals on the models, it's the same process. The decal can still be moved around on top of the enamel so you can place it where you want. Some people suggest letting it dry over night, or for a couple of hours on top of a kiln, but I don't have the patience for that... I'll dry it a bit with a heat gun, (be careful not to get it too hot, you just want to evaporate the water) then push out any air bubbles with a piece of cardboard or a paper towel. Air bubbles will cause pinholes in the decal, which can be cool, or not. I used to obsess about popping all the bubbles with a needle, but it never really seemed to work... I find that heating it slowly with the torch, even if it bubbles up gives me pretty good results. It takes a lot of practice.
Picture
Picture
Picture
On the decal below, you can see parts of the image are light brown. That part wasn't fired into the enamel long enough. However, I like the way it looks, so I left it. And that's pretty much how you do it.
Picture
5 Comments

Back to the Earth

5/23/2015

2 Comments

 
I like routine, I like when things stay the same, I like when things don't change... it gives a sense of having control over our lives.
Picture
But the reality is that everything is constantly changing, coming in and out of existence... and the truth is - I like that too. Nothing is permanent or lasting and what I've expressed with these pieces is not knowing what stage of becoming they are in. Are they just being formed? Or are they just starting to decay? Solid earthy pieces which have the appearance of just being dug up or on their way back to the earth.
Picture
Picture
Picture
 This work is lucky enough to be in the same room as this exhibit:

EVAN HOLM's the river made no sound  a multi-dimensional solo show by sculptor-installation artist Evan Holm is open through June 27, 2015.  The first floor of Vessel Gallery will showcase Cloud|Clock a sound machine composed of kinetic wooden gears, cloud lattice, and 600 lbs of flour. Upstairs Holm has constructed Forest Pools. This installation, with 23 pools of sumi ink running through an oak grove, makes quite the impression. 
Oakland Art Murmur Reception: FRI, June 5, 6-9PM, music sound performance by Evan Holm
Vessel Gallery Artist Talk Series with the artist is Saturday June 13, 2PM.
2 Comments

New Year Resolutions: Etsy Metal Blog Carnival

1/5/2015

0 Comments

 
Picture
Check out what other Etsy Metal members have resolved to do for 2015:
2Roses 
Fenton Designs 
Laura Jane Bouton 
Beth Cyr  
Lou Hunter  
Nodeform  
res·o·lu·tion noun \ˌre-zə-ˈlü-shən\: the act of finding an answer or solution to a conflict, problem, etc. : the act of resolving something

: an answer or solution to something

: the ability of a device to show an image clearly and with a lot of detail
(http://www.merriam-webster.com/dictionary/resolution)

It seems like a New Year Resolution is finding problems that you may have and finding a way to fix them. I would like to eat less sugar, less carbs, I would like to lose weight, I don't work hard enough, my art isn't making enough money, blah blah blah... It seems like it's the same issues every year... Well, I've come to the conclusion that my life isn't so bad... it doesn't need 'fixing!' I'm just going to do the best I can each day and enjoy it while I'm doing it!! Although I may try to show images more clearly and with a lot of detail!!

Picture
Primitive Spiral Single Earring
0 Comments

Earring A Day

1/1/2015

0 Comments

 
ACK! I just committed to doing another 'A Day' challenge. Ok, it's been 5 years since the last one -Ring A Day

Picture
This one seems so do-able, it's not even a pair of earrings... it's just one single earring, how hard can that be? It's also very freeing not to have to make 2 earrings that look alike... it's hard to experiment when you do that.

So for January 1, day one. I thought I would start with a spiral. The direction my art has been evolving had been towards 'origins.' I've been working on a project called personal icons, where I have combined images from when I was little (mostly religious icon type things, in addition, to relics, superstitions, etc.) with styles from some of my favorite artists like Andy Warhol and Jean- Michel Basquiat. The other direction my art tends to find itself is primitive and organic, so I am working at getting those 2 directions more on the same path. Hence, my spiral earring.
My first thought was to  make a spiral earring... I've made them before... wire twisted into a spiral, then hammered, generally using 16-20 gauge wire. Probably about 20 minutes worth of work. Of course, I can't keep anything simple. Instead of 16 gauge wire, I thought it would be cool to use 4 gauge wire which is .3249" or 8.2515mm. Let's just say pretty thick. So curving that into a spiral after forging took a while. Then I wanted to add a thicker piece of sterling and forge it down for the ear wire and that took awhile too. Then there was more texturing followed by polishing followed by adding a heat patina. Then there were the photos and listing it on Etsy (cuz that's part of the challenge) and posting it on FaceBook and posting it on Flickr and then blogging about it here.
Picture
Let's just say it took longer than 20 minutes!
Picture
Picture
It's big and it's heavy... 3" high,1.25" wide, and .25" deep, not for the faint of heart. As a matter of fact, I think you have to be pretty bad ass to wear it!
0 Comments

Anticlastic Forming

11/10/2014

0 Comments

 
Picture
When I first started working with metal, everything I made was flat... after awhile I started to realize that metal could also be dimensional. One of the most intriguing and challenging forms for me was anticlastic forming. The best part was getting to buy new tools and getting to use words like 'sinusoidal stake' and even making some of my own hammers.
Picture
Picture
It was a pretty big learning curve (no pun intended) but I couldn't stop doing it. You can see some earlier photos from the 'Ring-A-Day' series on flickr. Forming it, of course was never enough, so I had to start enameling the forms as well. That was also challenging because I use a torch to fire my enamels and it takes some thinking about how to fire both sides of a spiral shape with a torch. For me, experimenting is one of the most fun things to do, so I was up for the challenge. I like using transparent enamels with Carefree Lustres©.
Picture
Picture
Picture
Picture
Picture
I just sent off some anticlastic formed ornaments to the National Ornamental Metal Museum in Memphis for the annual Holiday Ornament Showcase, as well as some anticlastic earrings for their Holiday Show and Sale
Picture
Picture
AND... I just listed these on Etsy
Picture
Picture
0 Comments

Etsy Metal Project Runway Episode 3

8/14/2014

0 Comments


"Welcome to the Future!"

Picture
"Project Runway" Season 13, Episode 3 Air Date: 08/07/14.

In this episode, the Project Runway designers were asked to integrate the past, present, and future in their creations and they were challenged to get inspiration from Marie Claire magazines from 1994, 20 years ago, to create looks they think will be relevant 20 years in the future.

So for the EtsyMetal Translation:

IF you were making jewelry in 1994, revisit one of your own creations and update it for 20 years in our future, 2034!

Or, make a piece that is inspired by your life in 1994 and modify it for the future 2034!

This was a hard one, mostly because I have to remember something! I think that it's generally safe to say at anytime in my art career, I make art based on my Photo Booth pictures and influenced by Andy Warhol. I feel that the styles of art come and go and come and go... always repeating cycles. In 20 years, I'm sure I'll still be using photo booth pictures with new technology in a slightly altered way.

Torch-fird enamels, decals, copper.

Check out the Etsy Metal blog here

0 Comments

EM Project Runway Challenge #2

8/7/2014

0 Comments

 
Picture
Picture
Episode 2: 
"Unconventional Movie Challenge"
 "Project Runway" Season 13, Episode 2  Air Date: 07/31/14.
In this episode, the designers' challenge was to create a look inspired by
"Things you would find in movie making & movie watching!"

So for our team challenge we are going to define it and use the same materials the designers used for their runway creations, or you can use the show's theme!
Remember this is a Unconventional Materials Challenge, go wild!

PAPER  •  STRAWS  •  TICKETS  •  ZIP TIES  • LETTERS (FONT)  •  COMPACT DISCS (CDS)
Of course, I had to go with letters. Also inspired by the movie - Jean Michel Basquiat, Radiant Child - and the artist, Paul Klee. I used 'A to Z' - letters pierced out of copper, torch-fired enamels with alphabet decals. They are big, 2" wide x 2.5" long
0 Comments

July 30th, 2014

7/30/2014

0 Comments

 
Picture
Picture
Picture
Etsy Metal Project Runway Challenge is back!
Episode 1: "The Judges Decide"
The Project Runway challenge: With one outfit, give the judges a glimpse of a hypothetical spring collection. Designers must choose from an assortment of 5 fabrics provided to them at the start of the challenge.
The EtsyMetal Translation: Pick how ever many of these 5 ingredients below to make a piece of jewelry!
RAIN
BIRDS
FIVE
OMBRE
GROWTH

I picked birds.
This bird necklace is inspired by the story of Demeter and Persephone from the book - Lost Goddesses of Early Greece - A Collection of Pre-hellenic Greek Myths by Charlene Spretnak.
I have just learned how to use decals with enamel and on the front I have added birds or parts of birds and on the back are the words - Leaves & Vines, Flowers & Grass, Grew into Fullness, Faded into Decay, Began Again.

Copper with torch-fired enamels.

0 Comments

Etsy Metal Blog Carnival - Patinas

7/6/2014

5 Comments

 
Time for the Blog Carnival! What patinas do you use? Any favorite recipes? 
Any disasters? Techniques & tips? 
Picture

I do a lot of torch fired enameling. I like the colors you can get with enamels, but a lot of the time I think of enamels as a patina. Not trying to get a solid even color, but a color mixed in with metal, leaving a more weathered, aged look. The benefit of using enamels in this way is that the look is relatively permanent. I don't need to seal it in any way.

BUT one of my favorite things to do is experiment. AND patinas on metal just cry out to be experimented with. You also have to give way to complete control when experimenting with patinas. For me, part of the fun is seeing what happens when you mix it all up. (Also when experimenting with patinas, it is a good idea to be sure to wear the proper protective equipment – goggles, gloves, dust or fume masks, etc.)
What you see here is an experiment with borax and heat. It is also cool to watch the borax bubble up when you torch it.
Picture
Picture
Picture
I like to collect patinas. That means when I'm doing other processes like etching or pickling, I can't help but notice the reactions on the metal when I leave a piece out (for a long time - I'm a little sloppy!) after etching and noticing the natural patina it has. So I gather the materials that created that look and match them up in different ways. I have an old plastic muffin tin (is it still called a tin if it's made out of plastic?) and I'll put the bits I have left over or mix up some new combos. Later I'll add water and paint them on metal.
Picture
Picture
Picture
Picture
Picture
Picture
This is a piece of steel with a torch patina
Here is a pair of earring with patinized enamel on the top discs and a salt, lemon juice, and copper patina sealed with clear nail polish.

Sometimes I will seal my patinas with a carnuba wax, or hair spray (Aqua Net), or clear nail polish. A friend of mine just gave me a can of Nikolas spray lacquer, but I haven't tried it yet. She liked it a lot, said that it didn't affect the patina.

Other patinas I use are liver of sulphur, prismacolor pencils, sometimes LOS with prismacolor pencils.
Picture
Check out and see what other Etsy Metal Members do with patinas!
2Roses
KSkilesJewelry
5 Comments

Enamels, Decals, and Richmond, CA - Part 1

6/23/2014

2 Comments

 
On June 2, 2014, I journeyed up to the Richmond Art Center with Mary Luke for a 5-day  'Radical Enameling' workshop with Andrew Kuebeck. This workshop was the first in a series of radical enameling workshops put on by the new Center for Enamel Arts, founded by Judy Stone. It was well worth the time and money to take a class beyond the basics of enameling - doesn't seem like there are a lot of those available.
I don't want to bore you with the details of the trip... however the details of the trip aren't boring, so I'm going to tell you anyway!

For our first stop along the way, Mary took us to the Rosie the Riveter Museum in Richmond. It was awesome! So thoughtfully done and very interesting. Definitely worth checking out.

Picture
After the museum, we went to check into our hotel, The Hotel Mac, in Point Richmond. Point Richmond's 'downtown' area is about 4 blocks big and very cute. We went to the 2nd floor to check in with Gloria, our first interesting person we met in Point Richmond. We had told her that we had just gone to the Rosie the Riveter Museum. Oddly enough, she told us that she had been a riveter during World War II in Los Angeles. What are the odds of running into a female riveter after going to the Rosie the Riveter Museum?! Coincidence? I don't think so!!
Picture
We loved Gloria, she was so interesting. She told us so many stories that I had to make a video with her. She'll be 90 this year and I do hope she writes that biography!!
Picture
After we loaded all our stuff into our hotel room, which was actually a brand new suite with a kitchen. We figured that we had enough time to get something to eat before we went to Andrew's lecture at CCA in Oakland, so we went to a tapas bar nearby to eat.
Picture
Fritatta
We enjoyed our tapas and sangria, then went about 2 blocks to the lecture. We climbed lots of stairs to get there... we knew we were a little late so we weren't surprised to see people already listening to Andrew's lecture. After a few minutes, Mary realized that the present slide said 'Thank You' and proceeded to guess that we had just missed his entire lecture. She was right. At least the tapas and sangria were good!

Ok, that's it for Part 1. I know a lot of you are waiting for the decal information... don't worry it will be in Part 2. Just enjoy the ride!
2 Comments
<<Previous
Forward>>
    join our mailing list
    * indicates required
    Close

    Categories

    All
    Artist Interviews
    Art & Physics
    Brooch A Day
    Earring A Day 2015
    Etsy Metal Blog Carnivals
    Fold Forming
    October
    Press
    Technique
    Vessel Gallery
    Wisdom

    Archives

    March 2019
    November 2018
    October 2018
    February 2017
    January 2017
    May 2016
    November 2015
    September 2015
    August 2015
    May 2015
    January 2015
    November 2014
    August 2014
    July 2014
    June 2014
    May 2014
    April 2014
    March 2014
    February 2014
    January 2014
    December 2013
    October 2013
    September 2013
    August 2013
    July 2013
    March 2013
    February 2013
    January 2013
    December 2012
    September 2012
    August 2012
    July 2012
    June 2012

    RSS Feed

Evelyn markasky
Santa Cruz, California

©2020